As a beginner, if you’ve never played in the CN and KR servers of Ragnarok Online Mobile (ROM) before, you must be looking for that guide that will prepare you for the SEA releaseof the game. No need to look elsewhere folks, everything you need to learn the basics is right here.
In this article, we’ll discuss the overview of to make sure you won’t look like a clueless chap once ROM SEA opens its server.
For your convenience, feel free to navigate the article using the quick links below:
- Creating your First Character
- Jobs and Progression
- Basic Functions and User Interface
- Interacting with Players, Partying Up, and Chatting
- Map Navigation
- Stats and Skills
- Items and Equipment
- Using the Camera
- Fatigue System
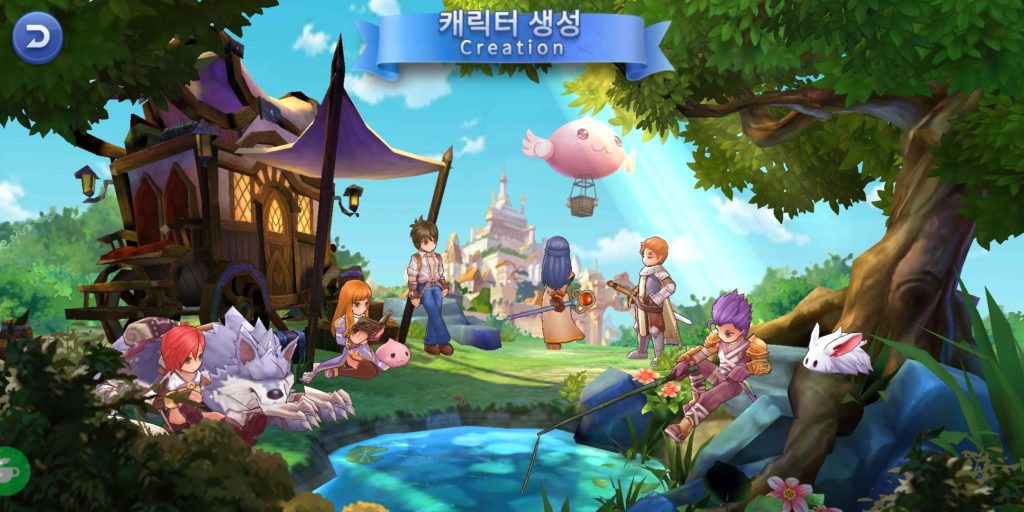
CREATING YOUR FIRST CHARACTER
After logging in the first time you will see 2 slots (on the upper left of the character selection screen) and a locked slot that will be unlocked once you have a transcended character (example: Lord Knight).
Tap on the blue bar (on the bottom right of the screen) to create your first character.
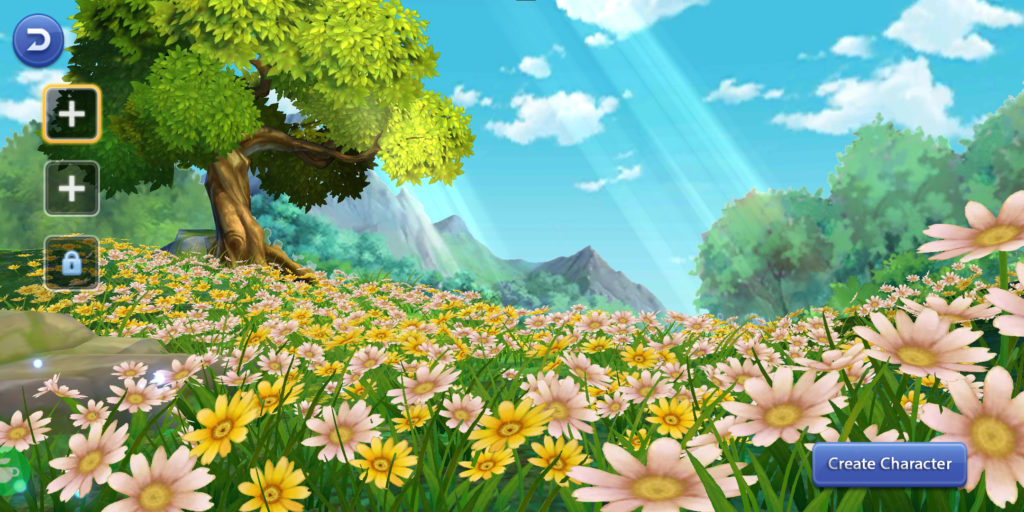
You will be taken to another screen where you can select one of the six jobs. It doesn’t matter which one you choose, as you can decide later which job you really want go for once you finish the first job change quest.
On the next screen you can customize how your character looks.
You can change the gender, pick one of the four starting hairstyles, choose a hair color, and enter a name (2-8 characters).
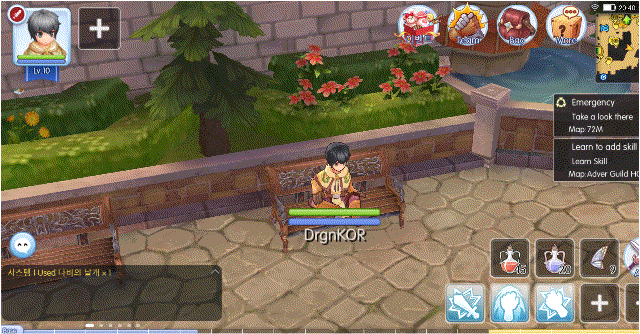
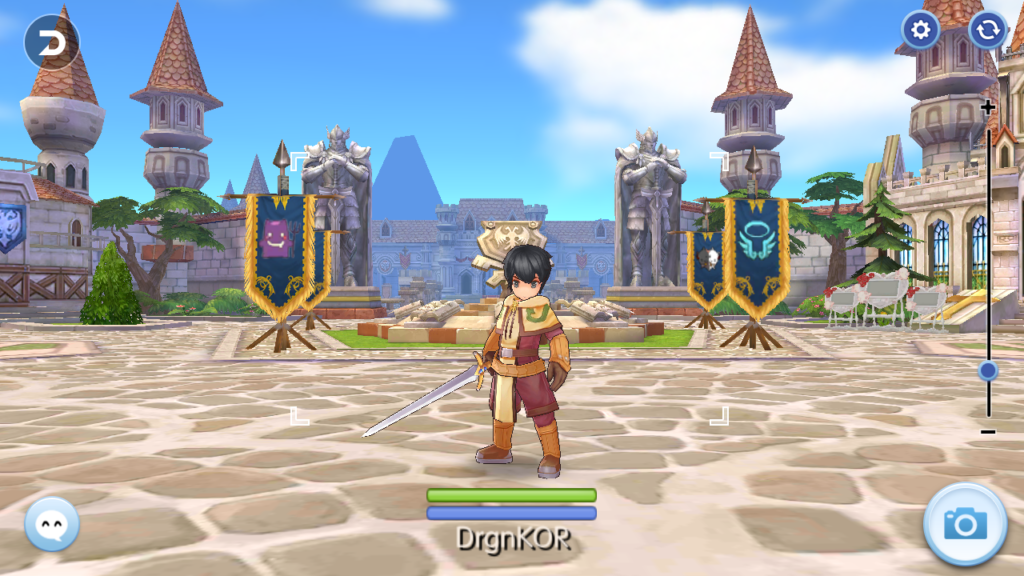
Now you’re ready to begin your adventure, so tap on that yellow bar (on the bottom right) and you will be spawned to the starting point, Prontera South Field.

JOBS AND PROGRESSION
On the last section, we mentioned six jobs that you can choose once you finish the first job change quest. Before we enter the world of Rune Midgard, here’s an overview (alphabetically arranged) of each job.
- Acolyte – Priest/Monk – High Priest/Champion – Arch Bishop/Shura
Acolytes are the main support class in ROM with their healing skills and buffs. This job uses maces, wands, or knuckles (if they choose the monk progression tree). Monks on the other hand are best known for their signature 1-hit-KO skill, Asura Strike.
- Archer – Hunter – Sniper – Ranger
Archers are the bow wielding animal lover job in ROM. They use their ranged attacks, companions, and traps to ensure that the enemy will not even get close to do them any harm. Unfortunately, their alternate jobs from the original RO is not yet released.
- Mage – Wizard – High Wizard – Warlock
Mages are the kings and queens of AoE damage in ROM. They wield fire, water, lightning, and non-elemental magic that will surely wreak havoc to any mobs who will cross their path. Flashy skill animations and tons of damage is their specialty. Like archers, their alternate job is not yet released.
- Merchant – Blacksmith/Alchemist – Whitesmith/Creator – Mechanic/Genetic
Merchants is known as the crafting class, from making a weapon, creating a homunculus, to even building a gundam (lol). These guys are real trouble, from maintaining DPS, nuking a target, buffing the party, to even tanking MVPs. They are simply ROM’s the jack-of-all-trades.
- Swordsman – Knight/Crusader – Lord Knight/Paladin – Rune Knight/Royal Guard
Swordsmen are the main tanks of ROM. But never underestimate their damage capabilities, even their first active skill, Bash, can deliver devastating damage given the right build. They use swords, spears, and shields. But hey, you can never go wrong with the classics, right?
- Thief – Assassin/Rogue – Assassin Cross/Stalker – Guillotine Cross/Shadow Chaser
Thieves are unconventional fighters in ROM. They hide in the shadows, poison enemies, strip equipment, copy skills, and more. With high agility and critical rate, they make big juicy numbers fly on the screen which is always satisfying to see.
Please note that some of the jobs may still be unavailable upon the release of ROM SEA, as some of these progressions were released on later episodes, and will depend on what episode will server start with.
The great thing in ROM is that all jobs are well-balanced and enjoyable on their own, and it’s a matter of choosing a playstyle that suits you so that you can maximize your gaming experience.
BASIC FUNCTIONS AND USER INTERFACE
ROM has a lot of functionality and features to learn as you progress in the game. Some of these are basic things you might miss. Here’s an overview to make sure that you and your friends, know everything useful in navigating your character.
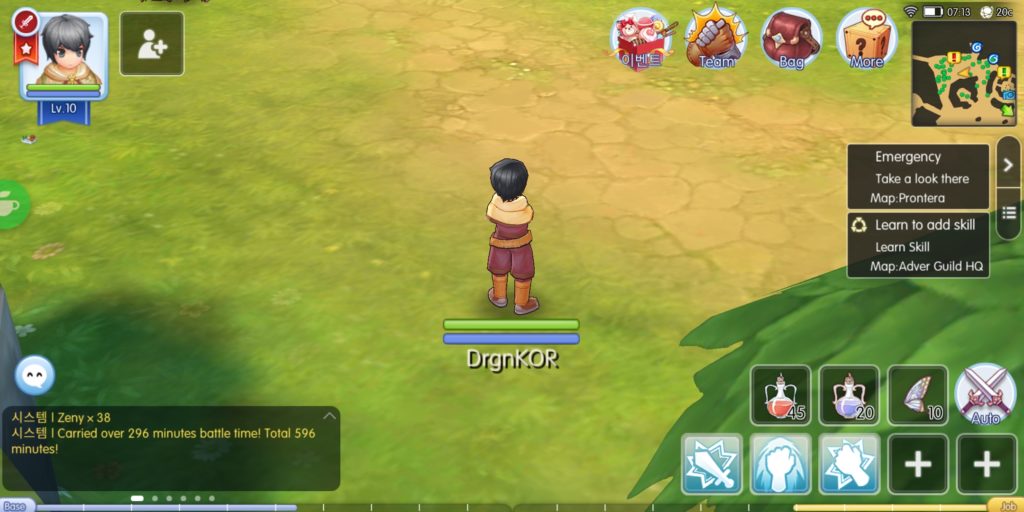
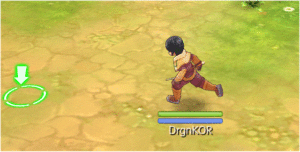
1. Moving – There are two ways to move, tap where you want to go on the screen (where you’ll see a green circle on the ground with an arrow pointing down) or tap and hold on the left side of the screen to use the virtual d-pad.
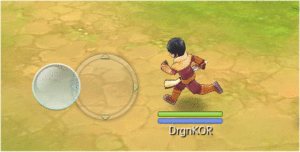
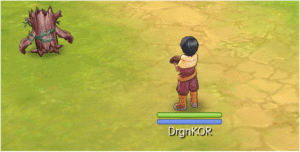
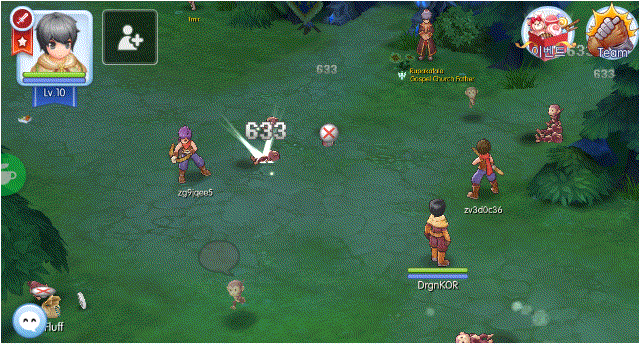
- Attacking – To attack, tap the monster you want to engage battle with. A red circle and enemy HP bar will appear beneath the monster while your character proceeds to beat it up to a pulp (unless the opposite happens).
You’ll also notice the monster’s icon pop up (on the upper left side of your screen). This will show you the monster’s name and its level.
 3. Auto Battle – This allows you to continuously engage mobs without that need to tap them repeatedly. It’s akin the bot program players have been using in RO, only difference is, this one’s legally a feature of the game.
To go on auto, just tap its icon (on the bottom right of the screen). A sub-window will appear and all you need to do is click on the name of the monster you want to continuously fight.
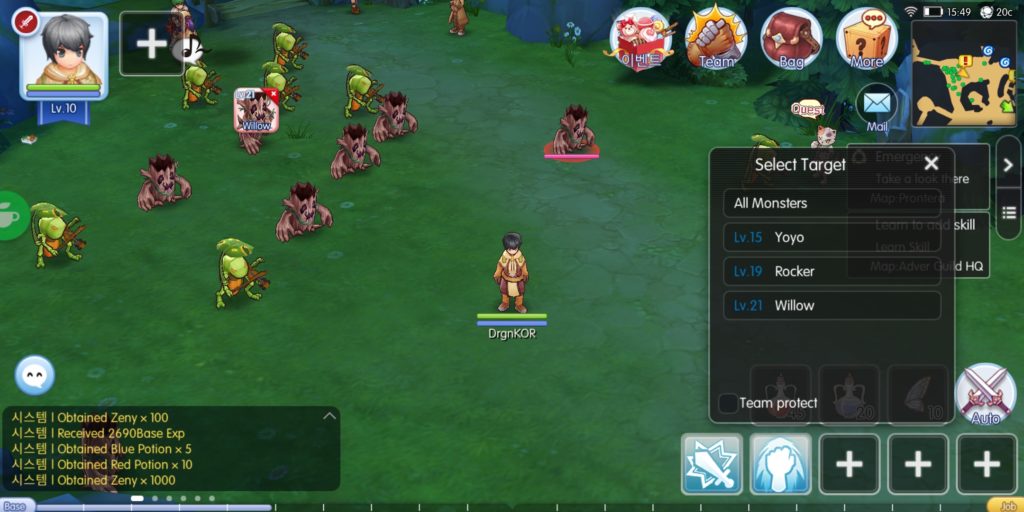
You also have the option to choose, “all monsters” which will make your character attack the nearest monster.
- Item and Skill Quickbars – ROM offers you the ease of using items and skills directly from the screen using these bars. You can assign a total of five items and six active skills (although one slot for the skills requires you learning a certain adventure skill.)
To use the assigned items and skills, just tap on the icon of the item or skill that you want to use. Remember that there are delays and cooldowns, so forget about going berserk and mashing the icons.
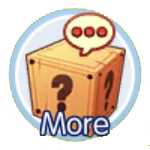 5. More – This is what we can consider as a menu. Tap on the “more” icon to open this window where you can see several features in ROM.
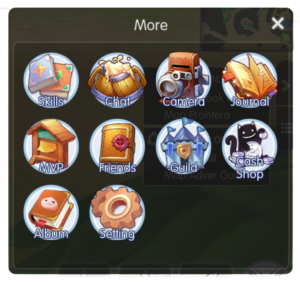
- Skills – Opens your character’s skill tree, active skill hotbar, and auto-battle skills assignment.
- Chat – Opens the chatroom creation window.
- Camera – Opens the camera interface which allows you to take snapshots (selfie, anyone?). This is very important when building your adventure level.
- Journal – Opens the adventure journal, where the feats and details of your adventure is recorded. From monster records to achievements, everything is here (Might as well call it a Pokedex).
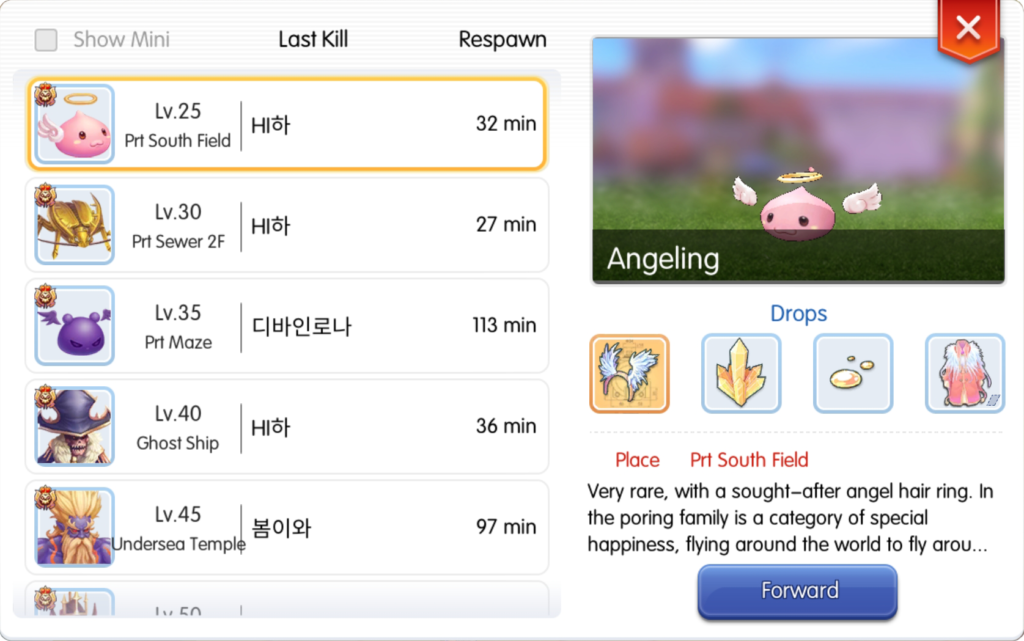
- MVP – This window shows you the MVPs, where you can find them, how many minutes before they respawn, their possible drops, and who defeated them on their previous spawn. You can also see the mini-bosses information, if you purchased the VIP ticket (assuming that it will be same in SEA).
- Friends – We all have friends. If you want to add another player, get a mentor, check if a friend is online, send them a whisper, this is the window that you need to open.
- Guild – Everything about guilds are here, from creating to joining one. It even allows you to teleport to your headquarters in the guild channel.
- Cash Shop – You can recharge premium currency, purchase cash shop items, and purchase a VIP ticket in this window. What the SEA cash shop will have is still a mystery so far, since they mentioned on the description in Playstore and App Store that there will be no VIPs.
- Album – All snapshots you took, given that you kept them, can be found here.
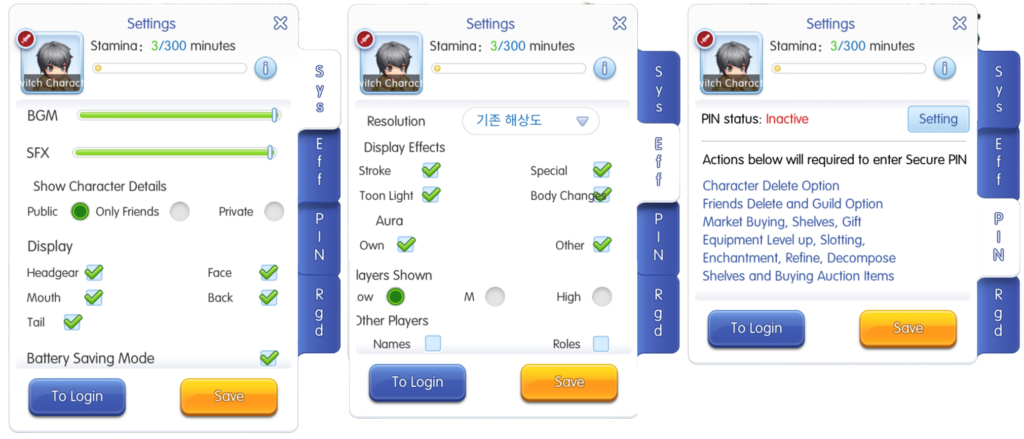
- Settings – If you need to customize you game experience, go back to the character selection screen, set up your character PIN, or check your fatigue, this window is what you need to open.
 6. Party – If you need to form a party with your best buds, just click on this icon, and the party window will open.
INTERACTING WITH PLAYERS, PARTYING UP, AND CHATTING
In the last section we brought up the party icon, so let’s talk about player to player interaction basics. In ROM, partying has its own benefits, whether it’s teaming up with your friends, leveling with your mentor, or simply clearing quests with others. It’s an efficient way to make your gaming experience more worthwhile.
- Creating a Party – It’s very easy to start your own party, all you have to do is tap the party/team icon, when the party window comes up, tap the “create” green bar (on the bottom left of the window), and you now have a new party formed.
- Party Settings – Just like in RO, you can adjust your party preferences by changing the settings, just tap on the party icon (if you have an active party), once the party window is open, tap on the blue cogwheel icon (on the top left of the party window). Only the party leader of course can change the party settings.
You can adjust the party purpose, level range requirement of members, loot distribution (whether it’s random or who’s nearest), and who can automatically join.
- Leaving a Party – Tap on the party icon, and tap on the “Leave” red bar (on the bottom left of the window).
- Inviting People to your Party – There are a lot of ways to do this, but if the person who you want to add to your party is not present on your screen, you can always add them through the “+” icon beside your character portrait (top right of the screen).
On this window, you can invite people from your friends list, guild members, recent people that you interacted with, and your mercenary cat (if you have any of them).
Let’s talk about additional interactions that you can perform with other players that you can see. If you tap on a character, their portrait comes up (on the upper left side of the screen). Tap on this to bring up the player sub-menu where you can see additional interactions that you can choose from.
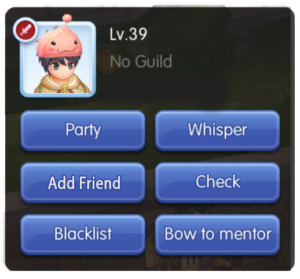
- Party – You directly add the player to your party, or form a party with the player if you don’t have one.
- Add Friend – You add a player to your friends’ list and request them to add you back.
- Blacklist – You block a player. They won’t be able to add you, send you a whisper, or add you on their friends’ list. Quite useful for managing toxicity in ROM.
- Whisper – Send a PM to a player.
- Check – Check their equipment (way to be a Peeping Tom).
- Bow to Mentor – Request mentorship from mentor-eligible players.
Next is the friends list. Now, we want to keep our friends easy to reach right? If you want to make sure that you can easily contact them, make sure to add them to your friendslist.
To add friends, tap on the “Friends” icon under “More”, tap the “two people with a +” icon (the middle icon on the bottom of the window), tap on the blank field, and type your friend’s IGN to search their character. Note that this is case sensitive, so capital letters on player IGNs should be as they are.
Similarly, you can also tap on their character if they’re nearby by tapping their portrait and “Add Friend” on the sub-menu (Now, I’m just repeating myself).
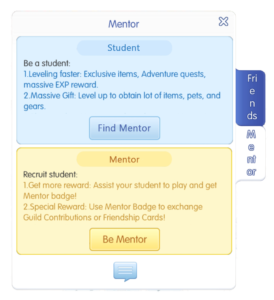
Another feature not to miss is the Mentor/Tutor System. This won’t be available right off the bat, since to be a mentor you need to be at least Level 80 and complete a quest.
There are a lot of benefits from having a mentor, but for now let’s just say the perks are having bonus experience when doing daily quests and partying up with your mentor.
You can find a mentor by tapping on the second tab under the friends’ list window.
Again, we might have to wait for a while for mentors to appear. Level 80 may take some time.
The last feature we’re going to discuss for this section is chatting with other players. To open the chat window, just tap on the chatbox (on the bottom left of your screen).
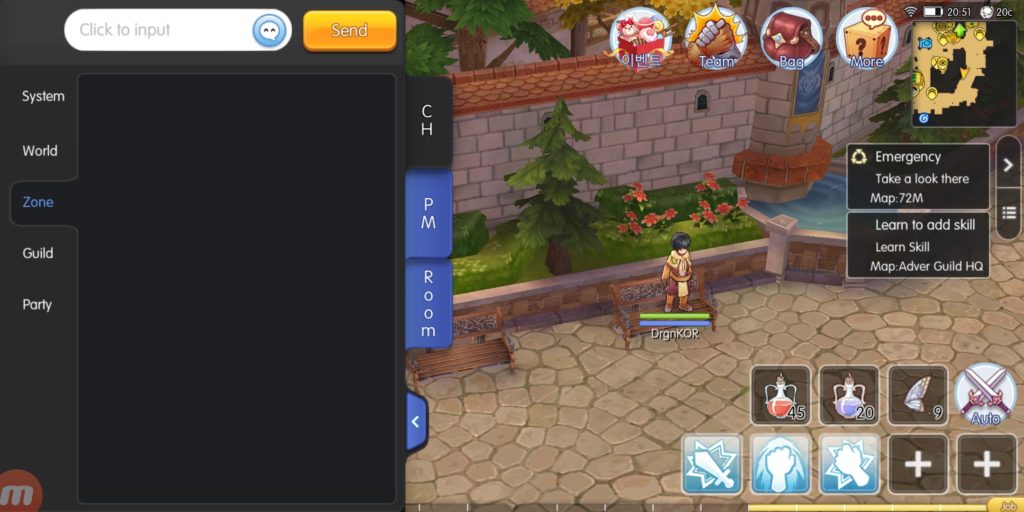
There are several tabs that you will see inside the chat window.
1. System – Tells you how much base and job experience you got from monsters, how much Zeny the monster dropped, monster drops you acquired, and auction items sold.
2. World – Talk to players across the server regardless of the channel they are in.
3. Zone – Talk to players in a zone/channel you are currently in.
4. Guild – Talk with your fellow guild members if you are part of one.
5. Party – Talk with your party members.
2. World – Talk to players across the server regardless of the channel they are in.
3. Zone – Talk to players in a zone/channel you are currently in.
4. Guild – Talk with your fellow guild members if you are part of one.
5. Party – Talk with your party members.
It’s relatively easy to communicate with other players, and the gaming experience can be boring without that occasional idling and taking it easy while having a good chat with friends.
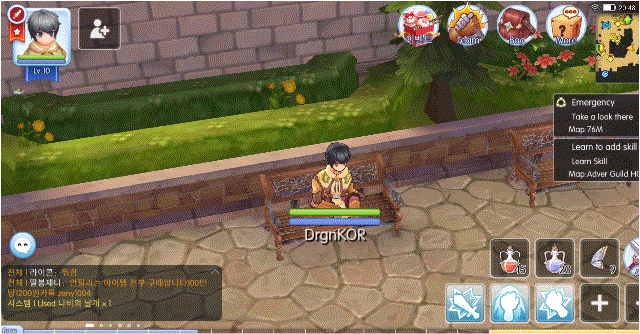
MAP NAVIGATION
One of ROMs feature that everybody loves is that it is open-world. No usual boring stage selection means that there’s a lot of places to explore! That’s why being knowledgeable about your map can save you from being lost, unless you really have a bad bad bad sense of direction.
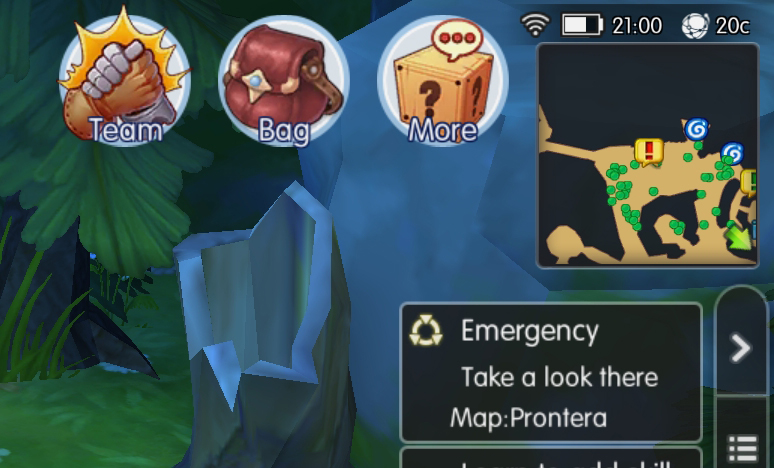
To start off, let’s discuss important mini-map legends that you need to know.
There are other icons on the mini-map like NPCs, but these should be the most crucial things that you need to be aware of as early as the beginning.
Now, let’s discuss the most useful function of the mini-map, waypoints. If you’re lazy like me, then nonstop tapping on the screen is boring. That’s probably why ROM developers included waypoints as a mini-map feature.
For those who don’t know what a waypoint is, it’s a game function where you can move to a spot by using map coordinates. ROM has two kinds of waypoints (I’m not sure if the second can be called a waypoint).
- Direct Waypoint – tap the map to maximize the mini-map window and then the spot where you want to go.
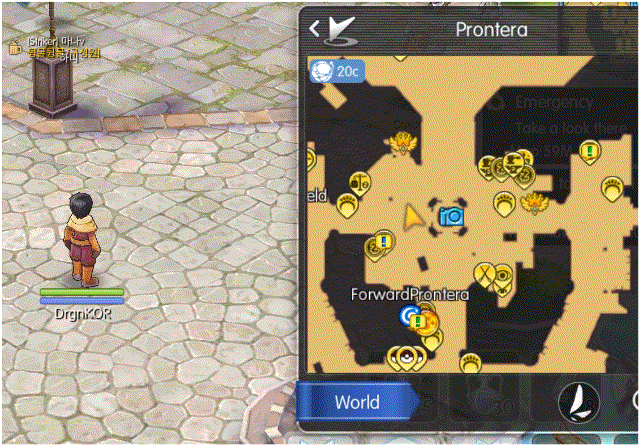
2. Indirect Waypoint – To do this, tap on the “World” blue bar (on the bottom left of the mini-map window) and the world map should come up on your screen. Tap on any map, where you should see a list (to the right) of NPCs and monsters in that area. Now, tapping on any of these, will automatically move your character to the NPC’s location or hunt that type of monster on that specific map.
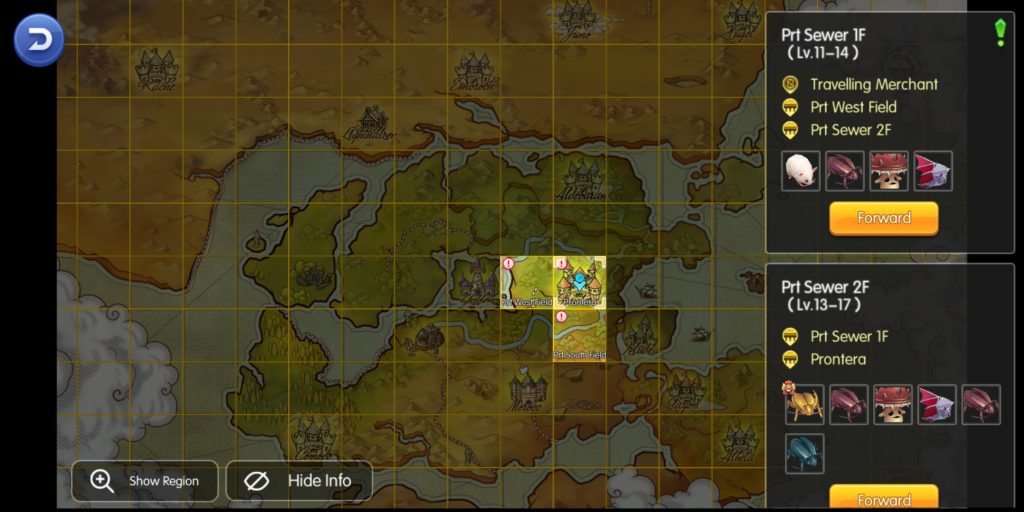
You can also just tap the yellow bar (on the bottom part of each list) to go to that map. A fair warning though, your character will walk even if it’s all the way to other end of the world.
The last thing and probably one of the more useful features of the mini-map: you can also use fly wings from there. Just tap on its icon (on the bottom right of the window) and it should teleport you to another spot on the current map (Now, that’s one item slot saved).
That concludes our guide for map navigation section. You are now a full-fledge navigator!
STATS AND SKILLS
Now, if you’ve never played RO before, you probably are not familiar about the stats and skills here.
There are 6 stats that you can increase every time you level up. To allocate stat points, tap on your character portrait (top left of the screen) to open your character information. The second tab is the stat allocation window.

For everyone’s sake, let’s summarize the basic descriptions of each stat in ROM.
- STR – Strength. This affects physical attack and bag slots.
- AGI – Agility. This affects attack speed and flee rate.
- VIT – Vitality. This affects defense and maximum HP.
- INT – Intelligence. This affects magic attack and maximum SP.
- DEX – Dexterity. This affects hit rate and casting speed.
- LUK – Luck. This affects critical rate and some skills (No it doesn’t affect drop rate).
Allocation points are obtained every time your base level increases. As your level goes higher, so as the number of points you get per level. As your stats go higher, so as the required points needed to further increase them.
Of course, let’s complete your knowledge by introducing skills in ROM. Just like in other games, each job has its own skill tree. To open your character’s skill tree, tap on “More”, and then “Skills”.
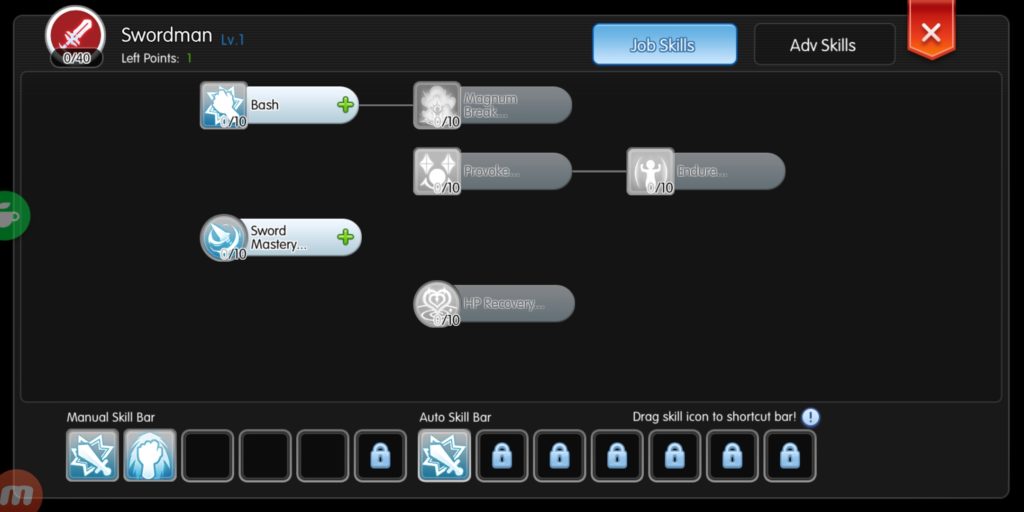
 Here you should see several interesting things. Note that your skills are arranged horizontally from left to right, according to your job progression. You have the option to choose which skills you would like to level up by allocating skill points.
Skill points are obtained from increasing your job level. One job level is equal to one skill point. Each job is maxed at job level 40 (the max job level can be increased, but that’s advanced stuff), so you’ll have 40 skill points for each job at the end of the day.
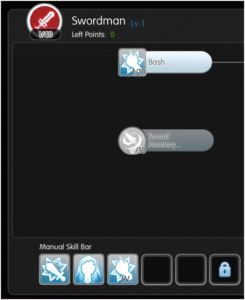
On the bottom of the skills window, you’ll see the manual and auto skill bars. This is where you assign your skills that you want to use in battle. Take note that square icons are active skills and circle icons are passives. To assign a skill, simply tap, drag, and then drop on an empty slot.
Skills on the Manual Skill Bar can be used actively by tapping on them during battle, while those that are in the Auto Skill Bar are automatically used during auto-battle.
There’s a second tab (on the top right of the skills window) that contains all your learned adventure skills. These skills are obtained through purchases on the northern side of Prontera, but some of them are available when you start.
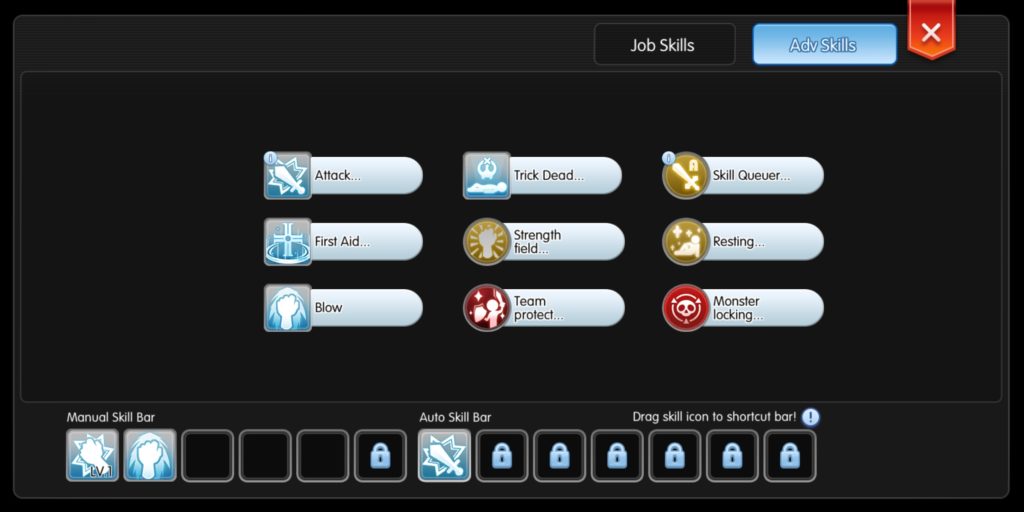
If you noticed, some skill slots has a lock icon. These are slots that you need to purchase (using Zeny, of course) first, and some even require a certain adventure rank. That means increasing your adventure level and rank is also important.
That should wrap up all the vital information you need to know about stats and skills. There are some things to learn with stats, but I will leave that for you to discover.
ITEMS AND EQUIPMENT
In this section, we are going to discuss the importance of your character’s bag. This is where you can find your items and equipment. Monster drops automatically go hereas well when you defeat mobs.
Unlike in RO where there is an individual weight for each item, ROM can stack up to 9999 pieces of each item and will only consume one bag slot. You can increase bag slots by attaining a certain level, adding STR (5 STR = 1 Bag Slot), or learning adventure skills which can add more bag slots.
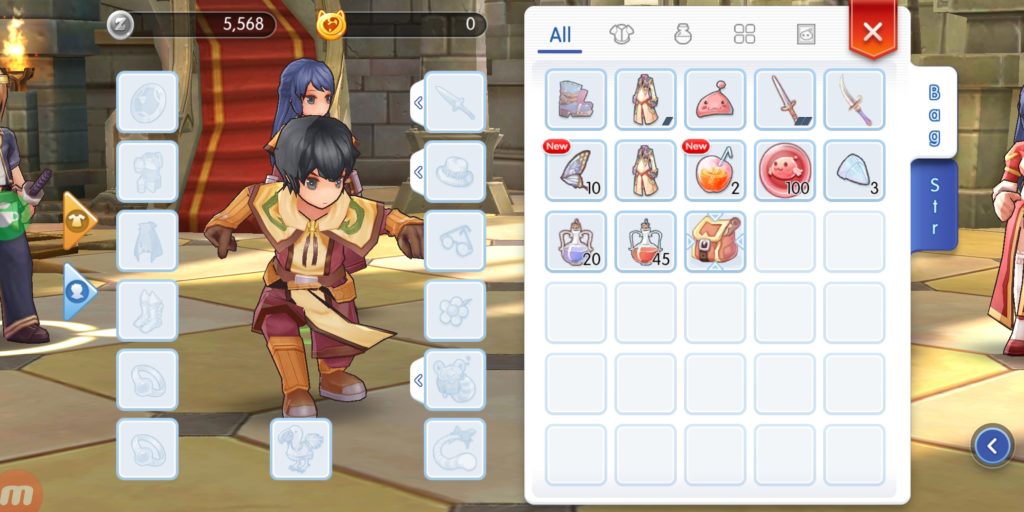
These are the 12 types of equipment that you can find in ROM.
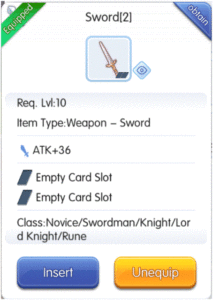 You probably noticed that there are some rhombus trapezoid-shaped black thing on some equipment. Those are slots. In ROM, you can insert a card in an equipment and remove it as well. Sounds great, right?
To check an item or equipment description, tap its icon to view the details. You can see what an item does, what attributes and requirements an equipment has, and you if you scroll down further, you’ll see its market price if you decide to sell it in the auction house.
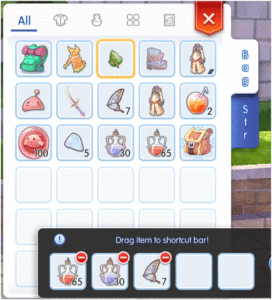 Do you remember about how you can use items without going to the bag using the item quickbar? Let’s talk about how to assign items to its slots.
First, open the quickbar from inside the bag by tapping the blue left arrow icon (on the bottom left of the window), then tap, hold and drag the item you wish to assign to a specific slot.
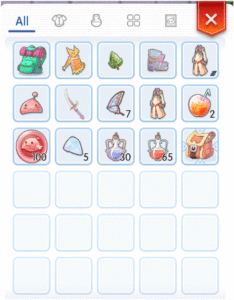 You can also filter the view of your bag if you’re trying to find something, especially if tons of items are already cluttered. Just tap on the small icons (on the top of the window), where you should be able to filter it to either:
- All
- Equipment
- Consumables
- Miscellaneous/Drops
- Cards
Quite convenient, if you ask me. Now if ever you feel the inventory is to confusing, you can always sort the items by dragging your finger down on the bag window, until you see a refresh sign, and that should sort your bag automatically.
That sums it up for the bag need-to-knows. Any more functions that we may have missed is something you can always discover in-game, but you should be able to handle things on your own.
USING THE CAMERA
Now this may sound a bit weird for some of you (especially if you’re not fond of selfies), but the camera is actually an important feature to get used to.
Aside from giving you the ability to create a screenshot in-game, this camera is one of the most used tool to get adventure experience, but that discussion is going to be for a different time.
First thing is how to use the camera. To open it, just tap on “More”, then “Camera”. The screen should zoom in to a third person view of your character and you should see the camera interface.
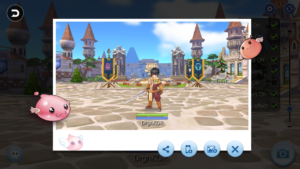
To take snapshot just tap the camera icon (on the bottom right of the screen). You can also change your character’s pose by tapping the emoticon icon (on the bottom left of the screen. There’s also a zoom slider (on the right), in case you want to a close-up shot.
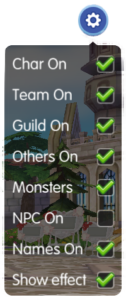 If you feel the screen is to crowded you adjust several options by tapping the cogwheel icon (on the top right of the screen).
Once you’ve taken a snapshot, you’ll get a polaroid looking photoand you have to decide whether to share it, save it in your device, save it in your album, or discard it.
 To exit the camerainterface by tapping the back icon (on the top left of the screen).
That’s it for the camera tutorial. Have fun creating new memories!
FATIGUE SYSTEM
And we’re on the last section of this article. So last but not the least, ROM’s fatigue system! For players fresh out of RO, this may be a relevantly new thing for you, unlike before, you can’t grind 24/7 anymore. The good news is, that gives you more time for a lot of things (like going back to the real world).
The simplest way to explain the fatigue system is that it allows you to get normalamount of experience points and drop rate. After you go beyond the fatigue system’s limit for the current day, the experience and drop rate will gradually decrease as you continue to hunt monsters, until they become almost non-existent.
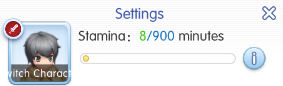
Here’s the thing about the fatigue system. Every day you get 300 minutes of stamina to consume. If you don’t use it, it carries over to the next day. It will continue to stack up until you hit the 900-minute limit. After that, you won’t be able to stack up anymore stamina.
Now, does that mean you only get to play 5 hours a day (300 / 60 = 5)? Not exactly! The fatigue system only gets consumed when you or a party member is on battle on the same map. Other than that, even if you sit all day, it won’t really go up.
The key takeaway here is that if you’re grinding, the most efficient way to use the fatigue system is to defeat the monster with the highest experience yield that you can kill with one hit.
Here’s a quick example scenario using a level 10 character for experience reference. Let’s say that you can defeat a Lunatic in one second and get 18 base and 6 job. While it would take you 2 seconds to defeat a Fabre and get you 19 base and 13 job.
The table below should show you how many monsters of that name you would kill in a minute in the fatigue system, and how many base and job experience would that net you. Take note—this is just an approximate calculation, actual results may vary, but it should be able to imitate the result that we want to show.

You can see there that killing Lunatics gets you 510 more base experience in an FS minute than Fabres even if Fabres give more base experience every kill. While you get 30 less job experience from killing Lunatics, the base experience difference is quite big to trade off. That’s how you take advantage of the limit that the fatigue system imposes.
Here’s a tip, in case you want additional numbers to your fatigue system, you can also add 60 more minutes by listening to music at South Prontera Field. Look for the Music Box (to the south-west from the entrance to Prontera).
 One minute of listening to music is equivalent to one additional minute to the fatigue system.
And that’s it for the fatigue system! Have fun leveling! Make sure to consume that stamina wisely.
LAST TIP FOR ALL BEGINNERS
This guide is meant to help you understand the basics of Ragnarok Online Mobile: Eternal Love. We’ll be making more guides that will talk about more advanced stuff in the right time, so kindly stay tuned in for more guides that will surely give you more knowledge about the game.
If you have any comments, suggestions, requests, or even questions, feel free to write below.
For players from the Philippines, you can also join the official ROM group in Facebook. Just click on the link below to be redirected there.